Navigation Bar

Friday, March 28, 2014

Recipe Round Up; Snack Time!


Happy Friday All!  I wanted to take the time to talk to you about some of my favorite snack recipes/ideas that I have been featured on the blog in the past month/months!  You see,  half marathon training is fully underway (I am talking long runs and sometimes double digit long weekend runs) and I find myself hungry all the time!  It is important to me to have healthy snacks accessible at all times, and not just healthy snacks but delicious snacks too!  So, enjoy my top snack picks from the blog! 


Thursday, March 27, 2014

{Sesame Kale Salad}


For those of you who have read the blog for a long time, you know that I have a slight addiction to the Lund's salad bar.  I mean the Lund's salad bar is my not so guilty pleasure (can you really feel guilty about a well stocked salad bar, well maybe when you see the price of your salad)!  For those of you who are not from Minnesota, and might not be familiar with Lund's, think Whole Foods and their amazing salad bar, but done local!  The Lund's salad bar is my weakness, and my go to for a quick and healthy dinner on those nights I just do not feel like cooking for one!


I mean we are talking fresh roasted veggies, grains, fruits, flax seeds, prepared fresh assorted salads, you name it and the Lund's salad bar probably has it!  One of my favorite items in or on the Lund's salad bar is this amazing Sesame Kale salad!  This salad always finds it's way into my salad container, and my sister and I pretty much go nuts when Lund's has it!  So you know what I did?  I recreated their delicious Sesame Kale Salad at home, and you know what it taste identical to Lund's, and now I can enjoy it anytime I want!  In fact, I snapped an iPhone picture of the finished salad and sent it to my sister and she couldn't tell the difference!  A few simple ingredients, and you have a flavor packed nutrient rich salad!


Sesame Kale Salad 
Brunch N'Cupcakes 
Serves 4

Ingredients:
1 Large Bunch Kale - Chopped 
2 Teaspoons Sesame Oil + Additional for drizzling over salad when serving 
1 Teaspoon Low Sodium Soy Sauce 
1 Tablespoon Sesame Seeds 
Course Ground Pepper to Taste
1 Cup Match Stick Carrots
Siracha - Optional for Serving 

Directions:
1- Place Kale in a large salad bowl and drizzle with sesame oil.  Message sesame oil into Kale leaves for 3-5 minutes.  Add soy sauce and again message kale leaves.  
2- Toss kale with sesame seeds, carrots and pepper and place in fridge for an hour to mingle. 
3- To serve divide kale among four plates and drizzle with additional sesame oil (about 1/2 teaspoon per plate) or drizzle with siracha for a little kick, both are optional.  Top this kale salad with avocado slices, grilled chicken/fish/shrimp, or beans for a little added bulk! 

Enjoy! 

Wednesday, March 26, 2014

{Spicy Lime Chicken Soup with Cilantro}


To say that I am over winter would be an absolute understatement.  And even as I watched the most beautiful snow fall yesterday, I longed for warmer weather, no snow, a long run outside and Spring clothes!  This long and cold winter has me day dreaming about beaches, and may or may not be the cause for my sudden need to highlight my hair, I just needed a change people!  


There might be hope for warmer weather in our near future, the forecast is saying 56 on Saturday, and you better believe I will be in shorts if Minnesota hits 56 degrees!  That would be a major heat wave people!  But in the mean time, I am going to take advantage of these colder temps and enjoy one of my favorite things!  Soup!  This soup is spicy and brightened up with lime juice, and packed full of protein!  Top this soup off with, greek yogurt, cheese, avocado and tortilla chips and you have a fiesta of a dinner!  Can you tell I have been day dreaming about tropical places?


 Spicy Lime Chicken Soup with Cilantro
Brunch N'Cupcakes 
Serves 4-6 

Ingredients:
2-3 Small Chicken Breast Cooked and Shredded (About a Pound)
1 Can Black Beans Rinsed and Drained 
2 Cups Unsalted Chicken Stock 
2 - 15 Oz. Cans Fired Roasted Tomatoes with Garlic 
1 Medium Red Onion Chopped 
1/2 Red or Green Pepper Chopped 
1 Pablano Pepper Chopped 
1 Jalapeno Seeded and Chopped 
2 Garlic Cloves Minced 
2 Teaspoons Siracha (or other hot sauce) 
1 Teaspoon Chili Powder 
2 Teaspoons Cumin 
Salt and Pepper to Taste 
1 Teaspoon Olive Oil 
Juice from One Lime 
Handful of Cilantro 

**Avocado, Greek Yogurt/Sour Cream, Cheese and Tortilla Chips for Serving


Directions:
1- In a medium stock pot heat olive oil and sauté onions until tender.  Add in garlic and saute until fragrant.  Add in Red/Green Pepper, Pablano Pepper, and Jalapeno Pepper.  Saute for 5 minutes, or until peppers are tender. 
2- Stir in Siracha and Spices.  Add tomatoes and chicken broth and bring to a boil.  Once boiling lower heat and cook soup for 5-7 minutes to ensure that soup is heated through. 
3- Stir in chicken, black beans, lime juice and cilantro.  Let simmer for 2-3 minutes and serve. 

To serve, divide soup among bowls and top with your favorite mexican inspired toppings.  I used pepper jack cheese and cilantro for my bowl.  Avocado would be delicious, as well as greek yogurt/sour cream! 

Enjoy! 


Monday, March 24, 2014

{Broccoli and Orzo Stuffed Peppers}


Hello, Friends!  How was everyones weekends?  Relaxing?  Mine was!  It was one of those weekends that started off with me crawling into bed Friday night around 9:30 PM, and the relaxed casual vibe of the weekend didn't stop there!  Saturday I treated myself to a mini spa day.  I treated myself to highlights and a haircut, and let me tell you it had been forever since I had done both of those things!  It was nice to treat myself and just spend a few hours relaxing and focusing on me!  Derek and I finalized plans for his birthday, watched lots and lots of basketball and celebrated a friend and her sons baptism!  It was truly a wonderful weekend!  And after a wonderful weekend, I am excited to be back with you today, sharing this delicious stuffed pepper recipe!  


These stuffed peppers are perfect for a meatless Monday meal!  They feature orzo, broccoli, and artichokes in flavorful tomato sauce.  Made filling with fiber/protein rich beans, and topped with tangy feta!  These stuffed peppers are easy to prepare, and reheat beautifully for lunch the next day!  Grab your favorite type of pepper, and get to cooking!   


Broccoli and Orzo Stuffed Peppers 
Brunch N'Cupcakes
Serves 4

Ingredients: 
2 Cups Broccoli Florets
1/2 Large Onion Chopped
1/2 Cup Artichoke Hearts chopped
4 Bell Peppers (Green, Red, Yellow or Orange)
3/4 Cup Orzo (Cooked according to package directions)
1/3 Cup White Beans
1/2 Cup  + 2 Tablespoons Feta Cheese
1 Teaspoon Cumin
Teaspoon Chili Powder
1 Teaspoon Lemon Pepper
1/2 Teaspoon Salt
1 1/2 Teaspoon Cajun Seasoning 
1 Small Jar Tomato Sauce (I prefer a garlicky red sauce)

Directions:
1- Preheat oven to 350 degrees, remove tops of 4 peppers and clean out seeds.
2- In a skillet sprayed with cooking spray saute onions until tender.  Add broccoli and artichoke hearts and cook until broccoli florets are tender.
3- Stir in cooked orzo, beans, feta, spices, and tomato sauce.
4- Stuff each green pepper evenly and place in a glass baking pan.  Top each pepper with about 1/2 tablespoon of feta and bake for 35 minutes or until peppers are tender.  

Enjoy!

Thursday, March 20, 2014

{Vegetable Stir Fry with Spicy Soy Ginger Sauce and Sesame Quinoa}


Guys, it's Thursday!  We have made it to the back half of the week, and that is exciting, considering I thought that it was Thursday on Tuesday!  It has just been one of those weeks!  Lots going on, long to do lists, I mean I could go on and on!  But that is not why I am here, I am here to talk to you about this amazing stir fry!  This amazingly spicy stir fry that is loaded with veggies, served over the best super grain ever (quinoa) and topped with a delicious "fried" egg for some added protein! 

Tuesday, March 18, 2014

{Spicy Zucchini and Chicken Enchiladas}


Let me just preface this post by saying these enchiladas are “hot”!  I thought Derek was going to blow smoke out of his ears, because of how hot these enchiladas were or are!  Don’t let this little statement scare you off, because these enchiladas truly are delicious, and you can use a milder salsa if you’re not big on spicy food like I am! 


Enchiladas growing up was one of my favorite meals.  My mom made and still does make one of my favorite chicken enchiladas.  My mom's are packed full of chicken, tomatoes, and onions all rolled up in a corn tortilla!  I think what I love about enchiladas as I have gotten older is the endless possibilities when it comes to the enchiladas innards.  You really can experiment with any type of protein and veggie.  You can make enchiladas as spicy or as mild as you like, and you really can almost please anyones palette!  These wonderfully spicy enchiladas are stuffed with sauteed onion, zucchini and chicken!  The filling is flavorful on its own, but these enchiladas get a real flavor kick from their salsa verde sauce, and pepper jack cheese!  As I mentioned above, use a milder salsa if you want a milder flavor!  


Spicy Zucchini and Chicken Enchiladas
Brunch N' Cupcakes
Serves 6 (or 12 if you use smaller corn tortillas)

Ingredients:
6 Whole Wheat Tortillas 
3 Zucchinis Chopped 
1/2 One Large Onion 
2 Chicken Breast Cut into 1 Inch Chunks (about 1 lb) 
1/2 Cup Chicken Broth 
6 Oz. Plain Greek Yogurt (I used Fage 2%)
1 Jar Salsa Verde
1/2 Cup Pepper Jack Cheese 
2 Teasoons Chili Powder
4 Garlic Cloves Minced (divided)
2 Teaspoons Cumin
1/2 Teaspoon Salt 
Lemon Pepper and Garlic Powder 
1 Teaspoon Olive Oil 

Directions

Enchilada filling and sauce:
1- In a skillet sprayed with cooking spray saute onions until tender.  Add 2 of the minced garlic cloves to the skillet and saute until fragrant.  Add zucchini, chili powder and cumin to the skillet and cook zucchini until tender (5-7 minutes).  Place zucchini mixture in a bowl and set to the side. 
2- Re-spray your pan with cooking spray and add chicken to skillet.  Sprinkle with salt, lemon pepper and garlic.  Cook chicken until no longer pink, and cooked through.  Add zucchini back into the skillet and begin working on enchilada sauce. 
3- In a small sauce pan heat olive oil, saute garlic until fragrant.   Add chicken broth and salsa to sauce pan.  Slowly add your greek yogurt to the sauce pan stirring constantly in order for yogurt to become incorporated into the sauce. 

Enchilada Assembly: 
1- Preheat oven to 350 degrees.  Spread 1/2 cup of your enchilada sauce evenly along the bottom of a 9x13 glass baking dish. 
2- To assemble enchiladas place about 1/3 cup enchilada filling into the center of the tortilla, role tightly and place seam down in baking dish.  Repeat with remaining tortillas. 
3- Once all enchiladas are in the baking dish, pour remaining enchilada sauce over top and sprinkle with cheese. 
4- Bake for 35 minutes or until heated through and cheese is melted and slightly browned. 

Serve with avocado slices, and additional salsa if desired! 

Enjoy! 

{Chocolate Orange Biscotti}


I have been craving a delicious biscotti for weeks now, probably since my coffee date with my mom on Valentine's Day!  I have been craving the slightly sweet delicate flavor of biscotti, and have longed for their crunchy texture, the crunchy texture that is just perfect for dunking into a frothy latte!  And as I sat biscottiless at the cutest little cafe yesterday, with a beautiful frothy latte, I decided it was time I took matters in to my own hands, meaning I had to make my own biscotti!  


And friends, that is exactly what I did!  These delicious crunchy cookies taste like my favorite child hood Pepperidge Farm cookie, Orange Chocolate Milanos!  They are sweet without being to sweet, and pair well with a delicious cup of coffee!  Slightly crunchy and bursting with flavor!  


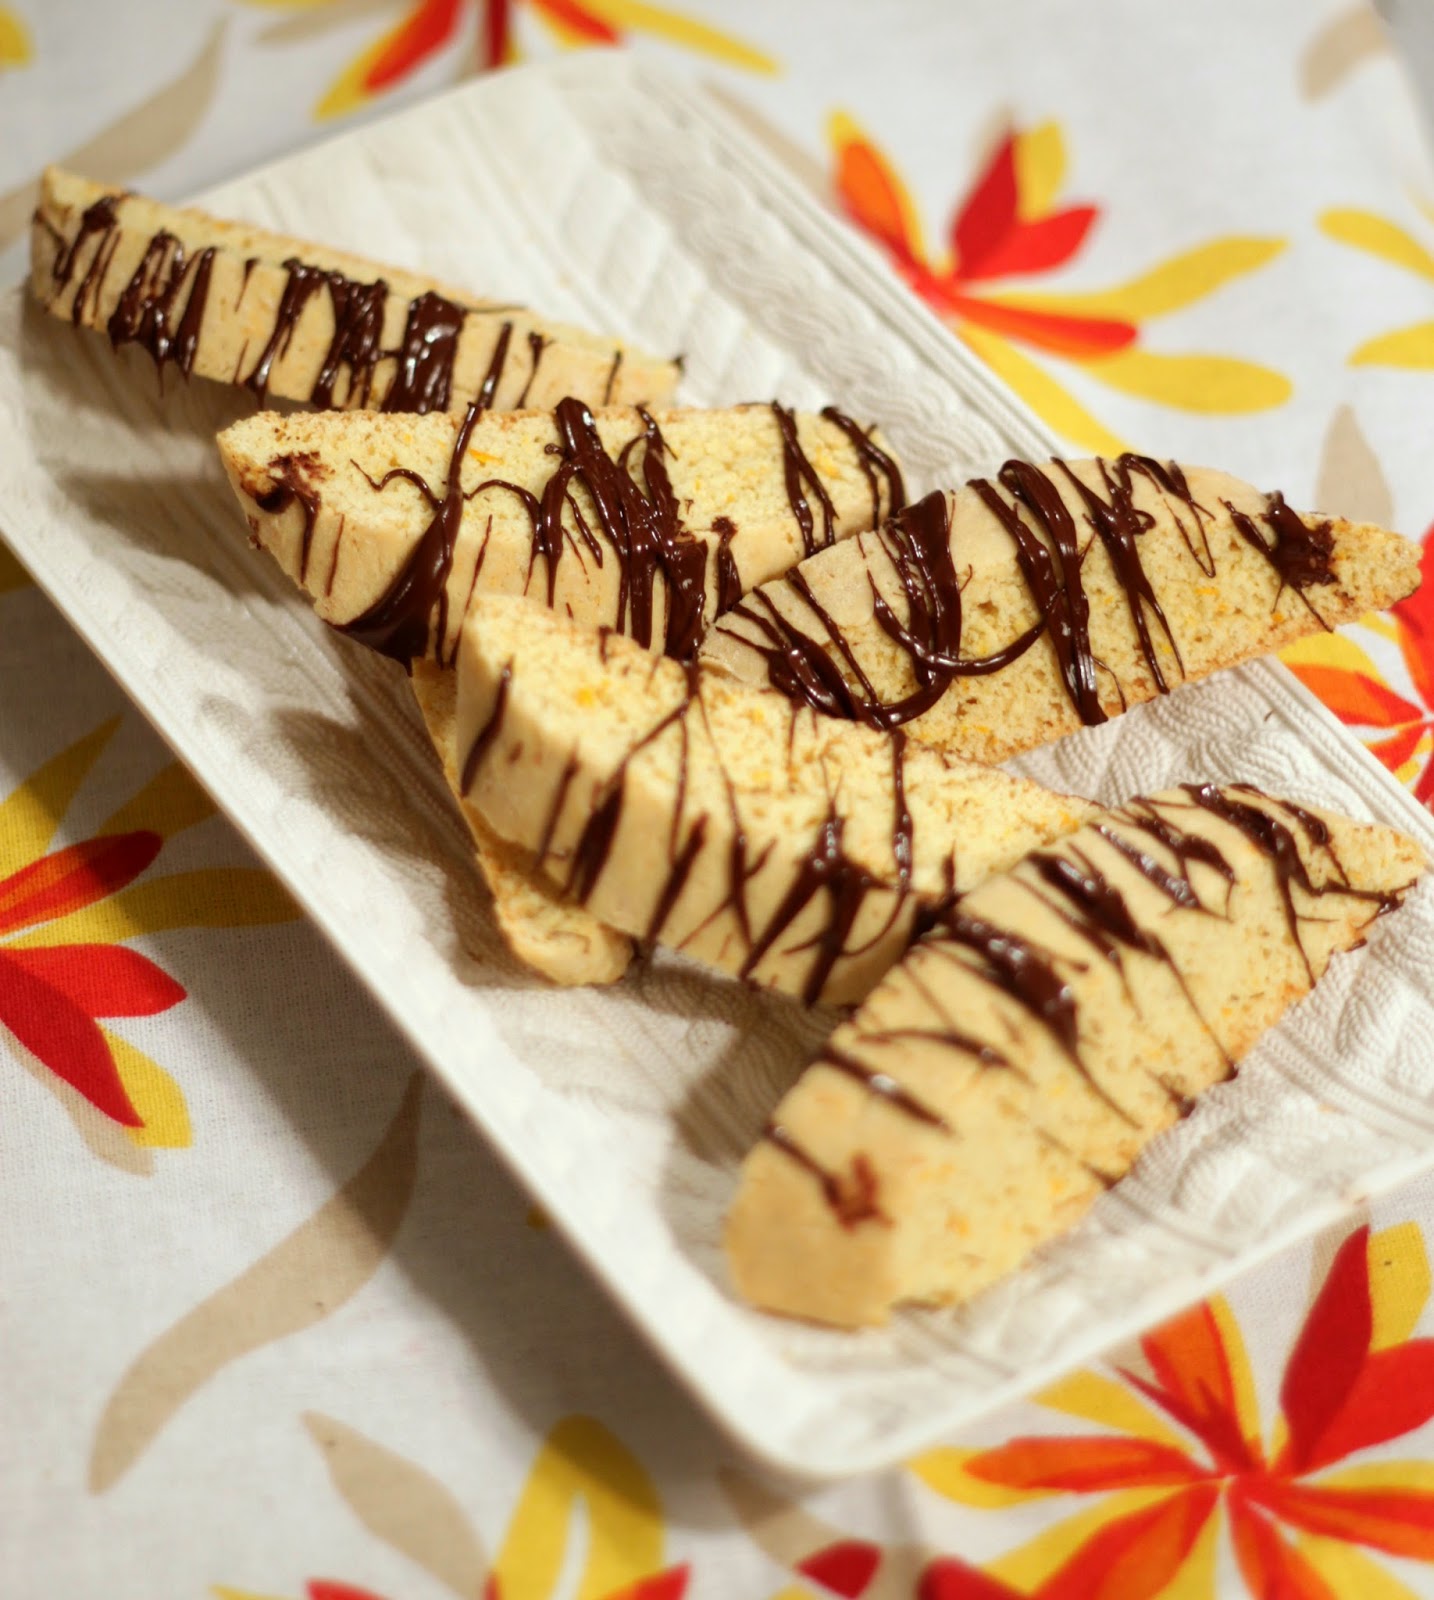
The ingredient for these lovely chocolate orange biscotti is simple, and many ingredients I am certain you already have at home!  Delicious plain, or made decedent with a drizzle of semi sweet chocolate.  Enjoy these on a Saturday morning with a cup of coffee, with afternoon tea or as a simple after dinner treat!  They are delicious, and addicting, but oh so good! 


 Chocolate Orange Biscotti
Brunch N'Cupcakes 
Makes 24 Cookies 

Ingredients 
1 3/4 Cup Flour 
3/4 Cup White Sugar 
1 Teaspoon Baking Powder 
1 Teaspoon Cinnamon 
2 Tablespoons Orange Juice 
2 Tablespoons Melted Butter
2 Eggs
Zest from 1 Orange 
1 Teaspoon Vanilla 
1/2 Cup Semi Sweet Chocolate Chips 

Directions:
1- Preheat oven to 350 degrees, and line a cookie sheet with parchment paper. 
2- Combine flour, sugar, baking powder, cinnamon in a large bowl.  Stir until well combined. 
3- In a separate bowl beat eggs.  Add in melted butter, vanilla, orange juice and orange zest.  Stir until combined. 
4- Add wet ingredients to try ingredients and stir until you get a sticky dough. 
5- Turn dough out onto a floured surface and coat with a light dusting of flour to make dough less sticky (you can also lightly wet your hands to make working with the dough easier).  Divide dough into 2 equal sections and shape into "logs" equal in length and thickness. 
6-Place logs on parchment lined cookie sheet and bake for 25 minutes. 
7- Once timer goes off, remove cookie sheet from oven and allow "logs" to cool for 10 minutes. Reduce oven heat to 325 degrees. 
8- When logs are cool, cut "logs" diagonal about 3/4 in thick.  Place cut biscotti on side and bake again for 7 minutes.  Remove biscotti from oven, and flip biscotti to other side and cook once again for 7 minutes. 
9- Allow biscotti to cool.  While biscotti cools, melt 1/2 cup semi sweet chocolate chips.  Drizzle melted chocolate over biscotti, and allow chocolate to harden. 
Enjoy! 


Monday, March 17, 2014

{Broccoli Quiche with Onions and Red Pepper}


Happy St. Patricks Day everyone!  I hope you are all wearing green today, so you don't get pinched!


I have been sitting on these pictures, and this quiche recipe for about a week now, or maybe even two!  I made this delicious quiche the night of the Academy Awards for Derek, my sister and I.  We all loved it, but I have to say I was not in love with any of the pictures I took!  But hey, I am not going to let a few mediocre pictures keep me from sharing this delicious, and lightened up broccoli quiche with you all!


Quiche - it is kind of a funny word, one that makes me laugh when I say it.  In fact when Derek and I were heading to my sisters to watch the Academy Awards, we talked about how weird of a name it was, and even said the word "quiche" a bunch of different ways.  It was pretty amusing, in fact I am laughing to myself right now as I type this!  This quiche is lightened up by using skim milk, and egg whites, and is chalk full of veggies.  Serve this quiche for brunch with fruit or for dinner with a side salad.  This quiche is sure to please a crowd.  


Broccoli Quiche with Onions and Red Pepper
Brunch N'Cupcakes 
Serves 8 

Ingredients:
1 Pie Crust (Whole Wheat is best) 
3 Egg Whites 
3/4 Cup Skim Milk 
1 Onion - Chopped
1 Head Broccoli - Chopped
1/2 Cup Red Pepper - Chopped
1/2 Cup Reduced Fat Sharp Cheddar 
1/3 Cup Swiss Cheese 
1 Teaspoon Salt 
1 Teaspoon Pepper

Directions:
1- Preheat oven to 350 degrees. 
2- In a skillet coated with cooking spray sauteé onion until tender.  Add broccoli, and pepper to the skillet and continue to sauteé until veggies are tender. 
3- Pour veggies into pie crust.  In a measuring cup combine egg whites, and skim milk.  Stir cheddar cheese into milk and egg mixture.  Pour over vegetables in pie curst.  Sprinkle top of quiche with swiss cheese and place quiche in the oven. 
4- Bake quiche for 45-50 min until quiche is set, and top of quiche is browned. 

Enjoy! 

Check out these other delicious quiche recipes from around the web!

Friday, March 14, 2014

{Baked Stuffed Lemon Chicken}


I really have no excuse for not blogging this week except for the fact that life simply got in the way! I feel as though I blinked and it was Friday, and I know I feel like I say that a lot but this week truly flew by.  And while life is always changing, and moving at warp speed, I still feel like I have been taking more time in these past few weeks to connect with the people I care about most in my life.  


In fact while we are on the topic of life and moving at warp speed, I realized the other day I am approaching my two year anniversary at work (I know crazy, right).  And as I came to this realization I slowly found myself  reflecting on how far I had come over the past two years, and how much I have grown as a person!  It is funny how you don't realize how much you have actually changed until you sit and take the time to reflect!  Crazy!  You know what else is crazy? It is crazy how good this stuffed chicken is, and how easy it is to make!  The finished dish is a work of art and would be a great recipe to serve at a smaller dinner party to "wow" your guests!  I made it for Derek and I as a cozy dinner in.  Serve the chicken alongside your favorite steamed veggies (ours are broccoli, cauliflower and carrots) and dinner rolls if you so desire!  This lovely stuffed chicken tastes as good as it looks, and it truly is a lovely presentation with the pops of red from the cranberries, and the green from the spinach!    


Baked Stuffed LemoChicken 
Brunch N'Cupcakes 
Serves 2-4

Ingredients:
2 Chicken Breast Pounded flat (I used a rolling pin for this) 
1 Cup Spinach Chopped 
1/2 Onion Chopped 
1/2 Cup Artichoke Hearts Chopped 
1/4 Cup Cranberries 
1/4 Cup Feta 
2 Tablespoons lemon juice 
2 Garlic Cloves Minced 
Lemon Pepper, Salt and Garlic Powder 

Directions:
1 -Preheat oven to 350 degrees. 
2- In a medium sized skillet heat a teaspoon of olive oil.  Sautee onion until translucent, add in garlic sautee until flavorful.  Stir in chipped artichoke hearts, and heat for 2 minutes.  Add chopped spinach  and cook spinach with artichoke and onion until wilted.  Stir in cranberries and feta, and set chicken stuffing to the side.  
3- Brush both sides of each chicken breast with about a teaspoon of olive oil and lightly sprinkle each chicken breast with salt, pepper and garlic powder.  Place both chicken breasts in a baking dish lined with parchment paper.  
4- Place half of the spinach stuffing on one half of one chicken breast, fold the other half of the chicken breast over the stuffing and stick with a toothpick.  Do the same with second chicken breast.  Bake for 35-40 min or until chicken is cooked through.  Make sure you cut into the thickest part of the chicken to check for pinkness!   Serve with lemon wedges to bring out the lemony flavor! 


Enjoy! 

Tuesday, March 11, 2014

{Peanut Butter Oatmeal Bites with Chia Seeds, Chocolate Chips and Cranberries}


The Girls on the Run Spring season has officially started!  We are about a week into the season, and I'm thrilled to be serving with GOTR as a coach again!  I love being able to spend a few hours with the GOTR girls, it is such a blast to watch these girls grow over the season, and to watch the team begin to act as one unified group!


Since GOTR has started up again, I need easy and packable snacks that will keep my energy up  all through practice!  Generally I am heading straight to the gym after GOTR practice, so my snack needs to be substantial enough to keep me moving, but light enough, so I don't feel weighted down!   I have found that a mix of carbs and protein is just the answer to my snack needs on long, busy days!  These tiny peanut butter oatmeal bites are packed full of flavor and good for you ingredients like oatmeal, chia seeds, peanut butter and honey!  These flavor packed bites get a little chocolaty goodness from semi sweet chocolate chips, and a zing from dried cranberries!  Make a batch and store in an air tight container for about a week!  They are the perfect power snack that can easily be thrown in your gym bag, work bag or purse!  


Peanut Butter Oatmeal Bites with Chia Seeds, Chocolate Chips and Cranberries
Brunch N'Cupcakes 
Makes about 20 balls 

Ingredients:
1 1/2 Cup Rolled Oats
1 Cup Peanut Butter (I used Jiff Natural) 
1/3 Cup Honey (can add 1/2 cup if you would like a little sweeter) 
1/2 Cup Chocolate Chips 
1/2 Cup Dried Cranberries (no sugar added) 
1/4 Cup Chia Seeds 

Directions:
1- Combine peanut butter, oats and honey.  Mix together until well combined (I used my hand mixer) 
2 - Add in Chia seeds and again mix together until well combined (once again used hand mixer). 
3- Stir in chocolate chips and cranberries.  Line a cookie sheet with parchment paper and begin shaping "dough" into one inch balls.  Continue rolling dough into one inch balls until no dough remains.  Place in fridge for about an hour to allow balls to firm.  Store in an air tight container for about a week. 

Enjoy! 

Friday, March 7, 2014

{Banana Oatmeal Chocolate Chip Cookies}


Fridays after a long week call for a sweet treat!  And these cookies are just perfect for curing your sweet tooth, and will brighten any day.   All you need is a handful of ingredients, many of which I am sure you have in your pantry, and a little bit of time!  These cookies smell like sweet banana bread, and the melty chocolate adds a touch of decadence!  Make them today, just because it is Friday, and Fridays call for cookies!  Happy Weekend! 

Banana Oatmeal Chocolate Chip Cookies
Brunch N'Cupcakes 
Makes 12-16 Cookies 

Ingredients:
2 Mashed Banans 
1 Cup Rolled Oats 
3/4 Cup Flour 
1/2  Cup Brown Sugar
1 Teaspoon Baking Powder 
1 Teaspoon Vanilla 
1/2 Cup Chocolate Chips 

Directions 
1- Combined Oats, Flour, Brown Sugar and Baking powder in a large bowl.  
2- Add in your mashed banana and vanilla.  Stir until wet and dry ingredients are well incorporated. 
3- Add in chocolate chips. 
4- Drop Spoonfuls of batter onto a cookie sheet lined with parchment paper.  Bake in a 350 degree oven for 16-20 min or until cookies are slightly browned. 

Enjoy! 


Thursday, March 6, 2014

{Roasted Broccoli Naan Pizza, with Artichoke Hearts}


Pizza is one of those good old comfort foods and just so happens to be one of Derek's favorite foods! Derek and I don't agree on our pizza toppings (he loves meat and cheese, I lean towards veggies),  but we do agree on the fact that pizza night is one of the best nights!  Homemade pizza is one of my go to, no think meals I guess you could say.  I know that if I top naan, tortillas or store bought pizza crust with a variety of toppings that the end result will always be delicious!  


I also know that I am one of those people that prefers homemade pizza to store bought or take out pizza.  I love the freshness of homemade pizza, and love that you can create your own flavor combinations! The sky is the limit when it comes to pizza toppings.  


I mentioned above that I lean more towards veggies when it comes to pizza toppings, and this pizza is definitely up my veggie loving alley!  Whole wheat naan is brushed with olive oil and then topped with artichoke hearts, and roasted broccoli.  And the whole pizza is finished off with a blend of swiss and mozzarella cheese and a drizzle of siracha for a spicy punch!  With this recipe you can have a delicious comforting meal in less then an hour!  Make this pizza your next pizza night recipe! 


Roasted Broccoli Naan Pizza with Artichoke Hearts 
Brunch N'Cupcakes 
Serves 4

Ingredients:
2 Whole Wheat Naan Rounds (I used Authentic Naan Brand) 
1 1/2 Cup Broccoli Florets (about 1 head of broccoli) 
1/2 Cup canned artichoke hearts drained and chopped (squeeze excess water out) 
4 Teaspoons Olive Oil 
1/4 Teaspoon Salt 
1 Teaspoon Garlic
1/2 Teaspoon Chili Powder 
1/4 Cup Mozzarella Cheese 
1/3 Cup Swiss Cheese

Directions:
1- Place chopped broccoli in a large bowl.  Drizzle with 2 teaspoons of olive oil, salt, garlic, chili powder and fresh black pepper.  Toss broccoli in bowl until evenly covered with olive oil and spices.  
2- Spread broccoli out evenly on a baking pan.  Place in oven with broiler on high.   Roast for 10-15 minutes or until broccoli is tender and crispy.  
3- While broccoli is in the oven, place both naan rounds on a baking sheet.  Brush the top of each naan with 1 teaspoon olive oil.  Sprinkle with pepper and garlic.  
4- Top each naan with about 1/4 cup chopped artichoke hearts.  Once the broccoli is roasted, divide broccoli among pizza.  
5- Divide cheese among pizza, and place in oven.  With the broiler set on high, bake pizza for 3-4 minutes or until cheese is melted and slightly browned.  Pull pizzas from oven, drizzle with siracha and serve.  (each naan will produce 4 wedges.  One serving is 2 wedges)

Enjoy! 

Tuesday, March 4, 2014

{Treat; Monster Cookies}


Anyone celebrating Mardi Gras/Fat Tuesday today/tonight?  I have to say that I am not, I kinda forgot about Mardi Gras this year... Oops!  If I was still living in Indianapolis I would be celebrating Mardi Gras by enjoying the most delicious Chili Cheese Etouffee, from the best Cajun Creole restaurant, Yats!  If you live in Indianapolis you know what I am talking about! 


But alas, no Chili Cheese Etouffee for this girl!  But I do have some pretty delicious monster cookies sitting around my house!  These cookies are a spin off of my White Chocolate Peanut Butter Oatmeal Cookies!  My Monster Cookies are packed full of peanut butter goodness, and loaded with chocolate!  You might want to make a double batch, because these cookies won't be around for long!  


Monster Cookies
Recipe- Brunch and Cupcakes 

Ingredients:1 Cup Oats
1 Cup Flour
1/2 Cup Brown Sugar
1/2 Cup M&M's
1/2 Cup Milk Chocolate Chips
3/4 Cup Peanut Butter
1 Egg
1/2 Cup Butter
1 Teaspoon Baking Soda 

Directions:

1- Preheat oven to 350 degrees
2- In a large  bowl combine brown sugar, peanut butter and butter.  Beat with a hand mixer until smooth and well combined.   Add your egg and beat again with a hand held mixer, set aside
3- In another bowl combine your dry ingredients; Oats, flour, and baking soda.  Stir until combined.
4- Slowly add your dry ingredients into your wet ingredients.  Use your hand mixer and mix until wet and dry ingredients are combined.  Set hand mixer aside and stir in chocolate chips and M&M's.
5- Role dough into 1" balls and place on an un-greased cookie sheet.  Bake for 8 minutes.  Remove from oven and smash cookies with the bottom of a glass.  Remember to press just enough to flatten the cookies, be careful.  Return cookies to oven and bake for another 6 minutes.   Allow cookies to cool on pan before removing.  Repeat with the remaining dough. 

**Note, store cookies in and air tight container.
Enjoy! 

Monday, March 3, 2014

{Cinnamon, Honey, Cornmeal Pancakes}


I think it is safe to say that everyone lives for the weekends! I know I do, and I am a huge fan of weekends with absolutely no plans!  There is something wonderful about waking up on a Saturday morning, where you can enjoy a leisurely cup of coffee, and of course whip up a delicious homemade brunch!