Navigation Bar

Friday, February 28, 2014

{Pan Seared Salmon with Cilantro, Mint Sauce}


Friends,  we made it to Friday!  I cannot even begin to tell you how happy I am that the week is over!  It has just been one of those weeks!   Buts lets not fret over a week that has passed, lets look ahead to the weekend!  And more importantly, lets talk about this amazingly delicious and oh so simple salmon recipe!  


The idea for this salmon recipe popped into my head one sleepless night this week.  So I quickly flipped on the light and jotted down the recipe in the little notebook I keep by my bed!  I am so glad I took the time to scribble this recipe down, because it is hands down amazing (Derek absolutely loved this dish)!  The salmon is pan seared in a bit of olive oil, and topped with a flavorful cilantro mint sauce.   Serve with simple steamed veggies (think broccoli and cauliflower) and you have an easy, healthy and flavor packed meal in under 40 minutes!  Now thats my kind of dinner! 


Pan Seared Salmon with Cilantro, Mint Sauce 
Brunch N'Cupcakes 
Serves 2-4 

Ingredients: 
2 Salmon Filets (Skinned Removed, I used a little under a pound) 
Salt, Lemon Pepper and Garlic (To Sprinkle on Fish) 
1 Teaspoon Olive Oil 

For Cilantro, Mint Sauce 
1/2 Cup Fresh Cilantro 
1 Clove Garlic
1/4 Cup Fresh Mint 
1 1/2 Teaspoons Balsamic Vinegar 
1 1/2 Tablespoons Olive Oil 

Directions:
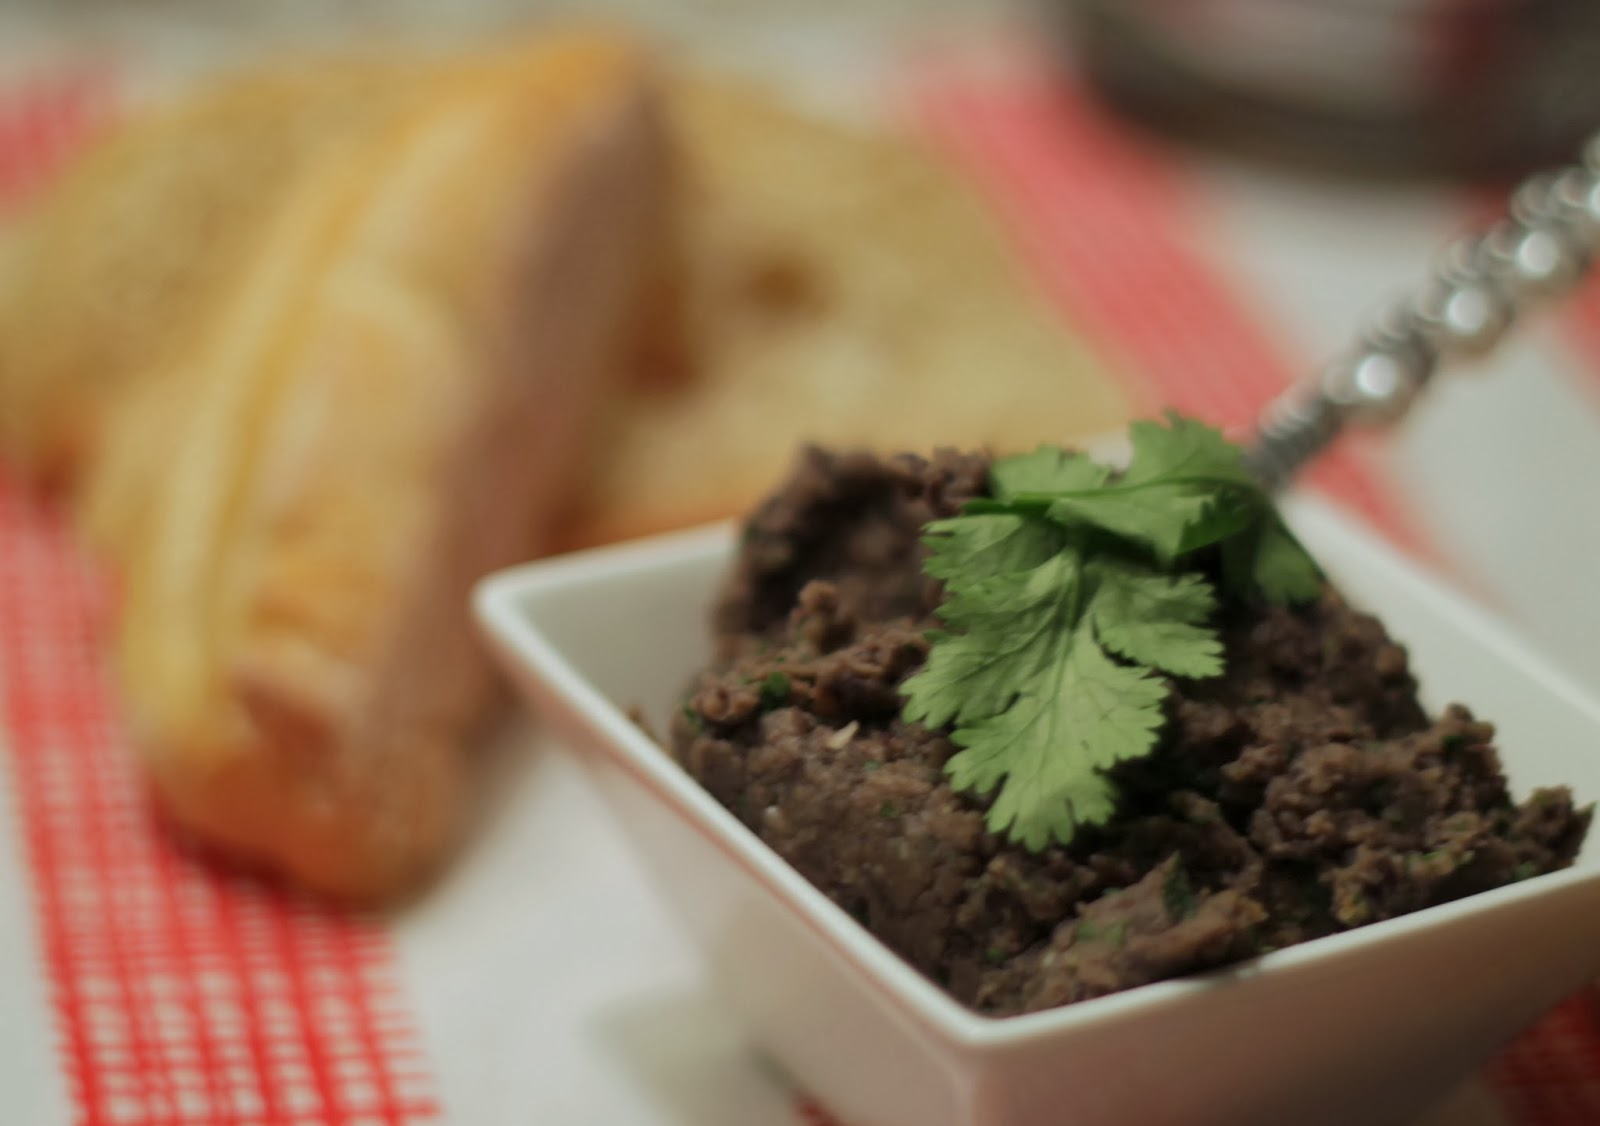
1- In a food processor (or blender) combine cilantro, mint, garlic, olive oil and balsamic vinegar.  
2- Blend until well combined, and herbs/garlic form a thick paste.  Scrape from food processor (blender) into a small bowl and set aside. 
3- Lightly brush both sides of the salmon filets with olive oil, and lightly sprinkle both sides with salt, garlic and lemon pepper.  Heat a skillet coated with cooking spray on medium heat.  Place salmon in skillet and cook for 5 minutes on each side, or until salmon has reached the desired doneness.  
4- Remove salmon from pan, and top each fillet with equal parts of the cilantro, mint sauce.  Serve. 

Enjoy! 


Thursday, February 27, 2014

{Avocado Egg Sandwich with Siracha Yogurt Sauce}


Egg sandwiches are becoming my favorite sandwich to quickly whip up.  They are my go to week night dinner for one, or my savory brunch pick on a lazy Saturday morning.  What I love best about a simple egg sandwich is the variety!  You can basically pile any veggie, cheese or spread you like onto your egg sandwich to make it your own unique creation!    You don't need any crazy ingredients to whip this simple sandwich up, but the end results are delicious!


This simple egg sandwich can easily be doubled for 2 or quadrupled for four!  I love the creaminess that the avocados gives the sandwich and the sharp cheddar and siracha yogurt sauce add a one, two punch of flavor!  Serve with coffee, OJ  and fruit for a complete weekend brunch, or with raw veggie sticks and fruit for a simple dinner!


Avocado Egg Sandwich with Siracha Yogurt Sauce:
Brunch N'Cupcakes 
Serves One 
(Easily double or Quadruple to serve a crowd)

Ingredients:
2 Slices Good Quality Bread (I love Ezekiel Bread 4:9) 
2-3 Avocado Slices 
1 Egg White 
1 Tablespoon Plain Greek Yogurt 
1-2 Teaspoon Siracha (depending on how spicy you like things) 
Salt and Pepper to Taste 
2 thin slices good quality sharp cheddar 
4 Thin Bell Pepper Slices
** Serve with fresh fruit of raw vegetable slices

Directions:
1- Toast your bread and set aside.  
2-Combine yogurt and siracha sauce in a small bowl and spread a thin layer over one slice of toasted bread.  Set aside. 
3- In a small skillet sprayed with cooking spray, fry your egg white. 
4- Assemble your sandwich.  Layer egg white atop slice of bread with siracha yogurt sauce facing up.  Next top egg with red pepper slices and top with avocado.  Sprinkle avocado with salt and pepper, and drizzle with remaining siracha yogurt sauce.  Top with second slice of bread. 

Enjoy! 


Wednesday, February 26, 2014

{Breakfast/Snack; Sweet Banana Oatmeal Muffins}


What is not to love about banana muffins?  I think banana muffins or bread has to be one of my all time favorite quick breads!  The only complaint I have about banana bread is, that I never seem to have over ripe bananas in my house when the banana bread craving strikes!  Now that is a problem, isn't it!  Thankfully, I have gotten smart and have started freezing my over ripe bananas, so that I have a nice stash on hand for the sole purpose of making delicious banana baked goods! Thankfully, I had a few over ripe bananas in the freezer to whip up these delicious muffins this past weekend!     


These muffins are a spin off of my moms amazing sugar top muffins.  Sweet, moist, and full of that good old comforting banana bread flavor.  Perfect plain straight from the oven, or try drizzling with honey, or toppig with your favorite nut butter (check out my honey roasted almond butter recipe)!   The oats give these muffins a hearty texture and the vanilla and cinnamon help amp the flavor.  Enjoy one with a cup of tea for a snack, or make them as part of your weekend brunch!  Throw in some chocolate chips if you like to make them decedent!  


Sweet Banana Oatmeal Muffins
Brunch N' Cupcakes 
Makes 12 Muffins 

Ingredients:
2 ripe bananas mashed 
3/4 Cup Milk 
1 Teaspoon Vanilla 
1 Egg 
3 Tablespoons Butter 
2 Tablespoon + 1 Teaspoon Plain Greek Yogurt 
1 Cup Flour 
1 1/2 Cup Rolled Oats 
1 Teaspoon Cinnamon 
1/2 Cup Brown Sugar 
3/4 Teaspoon Baking Powder 
2/3 Teaspoon Baking Soda 

Directions:
1- Preheat oven to 350 and grease muffin pan. 
2- Combine flour, oats, cinnamon, brown sugar, baking powder and baking soda.  Mix until well combined and set aside. 
3- Combine mashed bananas, milk, egg, vanilla, melted butter, and greek yogurt in a seperate bowl.  Beat with an electric mixture until combined. 
4- Add wet ingredients to dry ingredients and mix with an electric mixer on low until smooth and well combined. 
5- Grab greased muffin pan and fill 12 muffin cups.  Bake in 350 degree oven for 20-25 min or until golden brown.  Allow muffins to cook in muffin pan until cool.  

Tuesday, February 25, 2014

{Lunch/Dinner; Quinoa Salad with Herbs and Feta}


I am one of those brown bag lunch people!  I carefully plan and pack (ok, not always) my lunch the night before, so I can easily grab my lunch and go as I dash out the door for work!  My team at work can 9 times out of 10 count on me bringing a big salad with all the fixings for lunch.  I am talking avocado, almonds, loads of veggies, grains, you name it and its probably on my salad.  

However, lately I have been steering clear of big leafy green salads and turning more towards a grain based salad!  I love tossing whatever veggies I have on hand with a big scoop of grains and calling it, "lunch."  Toss the grains with a light vinaigrette, lemon juice and herbs and you have a delicious, flavorful salad!  This quinoa salad with herbs and feta is my take on a traditional tabouli, and makes an excellent meal!  Make a batch Sunday night and you have lunch for the entire week!  Bulgar is replaced with quinoa, and the salad gets a delicious flavor punch from the fresh herbs and thick chunks of feta cheese.  This salad truly is delicious and makes a great light lunch or dinner!  Serve with grilled chicken, shrimp or pan fried tofu for more substance! 


 Quinoa Salad with Herbs and Feta 
Brunch N'Cupcakes 
Serves 4 

Ingredients:
1 Cup Dry Quinoa, cooked according to package directions 
1 Cup Halved Cherry Tomatoes 
1 Cup Chopped Red Pepper 
1 Cup Broccoli Florets (finely chopped) 
1/4 Cup Chopped Onion 
1 Tablespoon Balsamic Capers 
1/4 Cup Reduced Fat Feta Cheese 
1 Large Handful Fresh Parsley Chopped 
1 Large Handful Fresh Cilantro Chopped 
2 Tablespoons Fresh Mint Chopped 
Juice from one Lemon 
1/2 Tablespoon Balsamic Vinegar 
Salt and Pepper to taste

Directions:
1- Combine cherry tomatoes, red pepper, broccoli and chopped onion in a large bowl.  Toss to combine.  Add in cooked quinoa and toss once again. 
2- Add chopped herbs, capers and feta, toss and set aside. 
3- In a small bowl combine balsamic vinegar and lemon juice.  Whisk together until combined. 
4- Pour lemon mixture of quinoa and veggies, toss salad to evenly distribute lemon juice.  Salt and pepper salad to taste. 

Enjoy! 

Monday, February 24, 2014

{Honey Roasted Almond Butter}


I am addicted to almond butter, I bet I probably go through at least a jar of almond butter a week!  And I am being completely serious!  I eat almond butter with apples, on warm thick slices of banana bread, and even straight out of the jar with a spoon.  Yes, I am obsessed!  


Trader Joe's makes the best raw almond butter, which is by far my favorite.  However I sometimes have the hardest time finding it!  That is why I decided to take matters into my own hand, and make my own delicious almond butter!  It is ridiculously easy to make your own almond butter, or any nut butter for that matter at home.   You just need a few key ingredients, a good quality blender or food processor and a little bit of time!  I used delicious honey roasted almonds to give a subtle sweetness to my almond butter, and it is delicious!  Serve it on toast for breakfast or use on sliced apples for a complete snack! 


Honey Roasted Almond Butter
Brunch N'Cupcakes 

Ingredients
8 oz. honey roasted silvered almonds (Trader Joe's) 
1/2 Tablespoon Honey 
1/4 Cup + 2 Tablespoons Water 
1 Teaspoon Coconut Oil 

Directions
1- Place almonds in a food processor and pulse until well ground. 
2- Add in honey, coconut oil and one tablespoon of water.  Pulse again.  Continue adding water 1 tablespoon at a time and pulsing with food processor until almond butter reaches your desired consistency.  I used about a 1/4 cup  + 1 Tablespoon water.  My almond butter turned out a little thicker then store bought, add more water if you want a thinner consistency!

Enjoy! 

Friday, February 21, 2014

{Homemade Chicken Noodle Soup}


 Blustery days filled with twirling snow calls for soup, and not just any soup… my favorite soup!   For as long as I can remember Chicken noodle soup has been my absolute favorite. 


Simple yes, but a warm bowl of homemade chicken noodle soup is anything but boring.  Chicken noodle soup is one of those classic soups that I never get sick of, and is one of those foods that is comforting to me, brings back memories of my childhood.  I remember growing up I had (probably still have) a white bowl that had tiny yellow ducks painted on the rim, it was the bowl I always had to use when eating chicken noodle soup.   I thought of this bowl last night as I sat enjoying my homemade chicken noodle soup out of what I call my grown up duck bowl (the one in the picture).   Like I said, chicken noodle soup just reminds me of being a kid, and is still to this day one of my favorites!  


 Homemade Chicken Noodle Soup 
Brunch N' Cupcakes 
Serves 6 

Ingredients: 
4 1/2 Cups Chicken Stock (I used Organic 360, great flavor) 
2 Cooked Chicken Breast cut into Chunks 
1 Small Onion 
6 Carrots Peeled and Chopped 
2 Cups Egg Noodles 
1 Teaspoon Olive Oil 
1 Big Handful Fresh Parsley Chopped 
2 Teaspoon Fresh Mint Chopped 
2-3 Teaspoons Fresh Lemon  Thyme Chopped (leaves) 
1/2 Teaspoon Ground Ginger 
Salt and Pepper to Taste 

Directions:
1- In a large stock pot heat one teaspoon olive oil.  Saute onions until tender.  Add carrots into stock pot and cook until carrots are tender (8-10 min) 
2- Stir in spices (ginger, salt and pepper) add stock and bring to boil. 
3- Once boiling add egg noodles, reduce to a simmer and cook 10-12 minutes or until noodles are tender. 
4- Stir in cubed chicken and fresh herbs, and serve. 

Enjoy! 


Wednesday, February 19, 2014

{Dinner: Tangy Turkey Meatballs}


There is one birthday gift that I will treasure for as long as I live.  The gift... a hand written cookbook from my grandmother containing some of our most cherished family recipes!  


The recipes in my cookbook have been passed down from generation to generation, and have withstood the test of time.  Just reading the recipes written in my grandmothers handwriting bring back memories from my childhood.  


 These delicious tangy meatballs are just one of the delicious recipes featured in my grandmothers cookbook!  I subbed in turkey for the ground beef to lighten these meatballs up!   Serve these meatballs with simple steamed veggies and rolls, atop brown rice, or if your a meat and potatoes type person whip up some garlicky red skin mashed potatoes.  Just make sure you have something to sop up the tangy BBQ sauce.  


Tangy BBQ Turkey Meatballs
Recipe my Grandmother
Makes about 24 meatballs

Ingredients: 
1 Lb Ground Turkey (you can use ground beef if you prefer)
1 Cup Bread Crumbs
1/2 Cup Milk
1 Teaspoon Salt
1/2 Cup Onion Chopped
1/2 Cup Red pepper
1/2 Cup Ketchup
1/2 Cup Vinegar
1/4 Cup Water
3 Tablespoons Sugar
1 1/2 Teaspoon Worcestershire Sauce
For Serving - Steamed Veggies (Cauliflower or Broccoli) or Mashed Potatoes, Brown Rice and Rolls

Directions: 

1- Combined ground turkey, bread crumbs, salt and milk in a large bowl.  Mix until ingredients are well incorporated.  Shape into 1 inch meatballs and place in a glass baking dish (9x13)
2- In a smaller bowl combine onion, red pepper, ketchup, vinegar, water, sugar and Worcestershire sauce.  Whisk together until combined, and pour over meatballs.
3- Bake meatballs in a 350 degree oven for 1 hour.

Serve with steamed veggies, or mashed potatoes, brown rice, and rolls!

Enjoy! 

Tuesday, February 18, 2014

{Snack Attack; Black Bean Hummus With Cilantro & Garlic}


When I first heard of hummus,  I thought the entire concept of eating mashed beans/legumes was a little odd.  The texture seemed weird, the color just looked unappealing and I figured there was no way I could or would ever like hummus! 


Boy, was I ever wrong!  I tried hummus and I absolutely fell in love with the stuff.  I now enjoy hummus all the time!  I enjoy hummus as a sandwich base, dip for veggies, topping for salads... I am sure I could list off a million other things but I will stop there!  I got the inspiration for this delicious black bean cilantro/garlic hummus from Trader Joe's.  Trader Joe's has a jalapeno cilantro hummus, and it is delicious.  But when I found myself with supplies to make my favorite hummus at home, I quickly turned to a lonely can of black beans and got creative.  The end result,  this delicious flavor packed black bean hummus!  


  Hummus not your thing?  Try it... you might just like it! 

Black Bean Hummus with Cilantro & Garlic
Brunch N'Cupcakes 

Ingredients:
1 Can Low Sodium Black Beans Drained 
2-3 Cloves Garlic (Depending on how garlicky you want it)
1/4 Cup Fresh Cilantro Leaves 
1 Teaspoon Cumin 
1/4 Teaspoon Salt 
2-3 Tablespoons Water 

Directions
1- In a food processor pulse garlic until chopped, add in cilantro and pulse/blend till finely chopped. 
2- Add black beans and 1 tablespoon water.  Pulse/blend until beans are mashed.  Check consistency and another tablespoon water, cumin and salt.  Pulse/blend until combined.  
3- Check consistency again, add  3rd tablespoon of water if you would prefer a thinner consistency.  

Enjoy! 

Monday, February 17, 2014

{White Bean Burschetta on Grilled Ciabatta Bread}


** I am sure you have all noticed the new look of the blog, and I want to talk about it a little bit before jumping into this delicious recipe!  I want to thank Lauren, of Teach Pray Love Design for my custom blog template!  She did a great job turning my blog vision into a beautiful reality!  Check out her Etsy shop for all your custom blog and invitation needs!  She is wonderful!  

Now, lets get to cooking! 


Warm thick cut ciabatta bread is one of my all time weakness.  Ciabatta bread is one of those perfect dunking breads,  perfect dunked in seasoned olive oil or as the base to a garlicky bruschetta, such as this one!  


The Red Wood Room (where Derek and I had our first date) one of my favorite hometown restaurants, serves the most amazing ciabatta bread.  They serve their thick crusty bread warm, along side garlic infused olive oil for dunking, and fresh Parmesan cheese to sprinkle on top!  


I could make a meal out of the bread and olive oil served at The Red Wood Room; give me a glass of wine, and some good company and I would be in heaven!  Although I might have to have some dessert too! 


But, we aren't here to discuss my love for the Red Wood Room and their fabulous bread.  No, we are here to discuss this colorful and delicious burschetta.  Tomatoes are combined with garlic, onion and white beans to form the substantial base of this burschetta.  Mint and basil give this burschetta a nice pop of flavor, and a lovely touch of green!  Balsamic capers add zing, and adds a nice touch to this full flavored burschetta.  Perfect for a party, or a simple weeknight dinner.  Pour yourself a glass of wine and enjoy! 


 White Bean Tomato Bruschetta on Grilled Ciabatta Bread
Brunch N' Cupcakes 
Serves 8-10 

Ingredients:
3 Large Tomatoes - Chopped and Seeded
1/2 Medium Onion finely Chopped
2 Garlic Cloves minced
1/2 Cup Fresh Basil Chopped
2 Teaspoons Fresh Mint Chopped
1/2 Cup Large White Beans
1-2 Teaspoons Pepper (or to taste)
1/4 Teaspoon Salt (more to taste if needed)
1 Tablespoon Balsamic Marinaded Capers
1 Loaf Ciabatta Bread, cut into 1 inch slices
1 Tablespoon Olive Oil, more for brushing on bread


Directions:

1- In a medium bowl combine olive oil, onions, garlic, tomatoes, white beans, and capers.  Toss until combined. 
2- Add your basil, mint, salt and pepper into your tomato mixture and once again toss until combined.  Set aside. 
3- Heat a grill pan on medium-low heat.  Place ciabatta bread in grill pan and cook until bread is golden and brown.  Brush toasted bread lightly with olive oil, top each slice with tomato mixture and serve! 


Friday, February 14, 2014

{Happy Heart Day - Special Treat}


Happy Heart Day!  I have a special treat for you today!  A treat that is sure to show the special people in your life just how much they mean to you!


Remember today is about showing those closest to you just how much you care, and love them!   Make some of these delicious little treats to give away, and make some to enjoy yourself!  Enjoy a sweet little Valentine's Day treat from me to you!   Happy Heart Day! 

Valentine's Day White Chocolate Truffles 
Brunch N' Cupcakes Adapted From All Recipes 

Ingredients:
3 Cups White Chocolate Chips
8 oz. Brick Cream Cheese
3 Cups Powder Sugar
2 Teaspoons Vanilla
Coco Powder, Additional Powder Sugar, Melted White Chocolate and Sprinkles for Decorating

Directions:
1- With a hand mixer beat cream cheese until smooth and fluffy.
2- Slowly add powder sugar into cream cheese, 1 cup at a time.  Make sure you are mixing well after adding each cup.
3- Melt white chocolate chips in 30 second increments until melted and smooth. Add melted white chocolate and vanilla into cream cheese mixture and beat until well combined.
4- Let cream cheese mixture sit in fridge for an hour.
5- Role chilled dough into 1 inch balls, place on cookie sheet.
6- Decorate truffles with melted chocolate, role in coco powder, powdered sugar, or sprinkles!

Enjoy! 


Thursday, February 13, 2014

{Breakfast; Sugar Top Muffins}


I love, love, love these muffins!  Words cannot explain how much I love these muffins.  I don't just love them because they are delicious, I love them because these sweet muffins bring back so many wonderful memories from my childhood! 


These delicious sugar top muffins were my moms go to muffin recipe, and were always requested by friends when they would stay over.  I remember my mom making these sweet muffins every year for my sister and I on our first day of school!  I always loved waking up to the sweet smell of cinnamon sugar every year on the first day of school, and just the smell of these muffins coming out of the oven the other day brought back all those sweet memories. 


 Studded with oatmeal and a cinnamon sugar "crust" these muffins will perk up any early morning! Make these muffins for someone special in your life to show them just how much you care.  Trust me, these sweet muffins would be a the perfect Valentine's treat for loved ones! 


Sugar Top Muffins 
Recipe from my Mom 
12 Muffins 

Ingredients:

Dry 
1 Cup Flour 
1 Cup Oatmeal 
3/4 Cup Brown Sugar 
3/4 Teaspoon Baking Soda 
3/4 Teaspoon Baking Powder 

Wet
1 Beaten Egg 
3/4 Cup Milk 
1/3 Cup Cooking Oil (Sub in applesauce for 1/2 the oil if you like)

Directions: 
1- Combine dry ingredients into one bowl and mix together. 
2- In a second bowl combine wet ingredients and mix until well combined. 
3- Add wet ingredients to your dry ingredients, mix until combined. 
4- Line 12 muffin cups with liners or spray with cooking spray.  Fill each muffin tin with batter and sprinkle with cinnamon sugar. 
5- Bake in a 375 degree oven for 18-20 minutes 

Enjoy!


Wednesday, February 12, 2014

{Creamy Cauliflower Soup}


Minnesota has been experiencing some bitterly cold days this winter!  In fact this winter is one of the coldest that Minnesota has seen in about 20 years!  There are days where I ask myself, why I am still living in this state, but then I just remember all the wonderful things about Minnesota.  Like our wonderful lakes, great running trails, fabulous restaurants and of course my family being here!  


During the bitter cold winter season,  soup is the perfect go to meal to warm up with after a long day.  I love this soup for many reasons.  This delicious cauliflower soup is creamy (without the addition of heavy cream), full of flavor and is quick to prepare.  Plus, you only need one pot which means easy clean up!  


Creamy Cauliflower Soup
Brunch N' Cupcakes 
Serves 4-6 

Ingredients:

2 1/2 Cups Vegetable or Chicken Broth 
1/2 Cup Plain Greek Yogurt 
1/4 Cup Milk of Choice 
1 Large Head Cauliflower 
1-2 Teaspoons Pepper 
Salt To Taste 
3 Teaspoons Basil
1/8th Teaspoon Nutmeg 
2-3 Garlic Cloves Minced 
1/2 Medium Onion Chopped 
1 Teaspoon Olive Oil 
Cheddar Cheese and crackers for serving

Directions: 
1- In a stock pot, heat olive oil.  Saute onion until translucent.  Add garlic to onion and cook until fragrant. 
2- Add broth and spices to stock pot and bring to boil.  When broth is boiling add chopped cauliflower and cook until tender (about 20 minutes)
3- Once cauliflower is tender, blend soup until smooth either with a hand emersion blender or by carefully pouring soup into a standing blender.  
4- Once soup is blended stir in greek yogurt and milk until combined.  Serve with cheddar cheese and crackers. 

Enjoy! 

Tuesday, February 11, 2014

{ Brussel Sprout Salad with Wheat Berries, Cranberries and Feta }


I am seriously in love with wheat berries!  I bought wheat berries on a whim to try in my salads, and I am not hooked on this super grain!   what I love most about wheat berries are their  hearty, slightly chewy texture, plus wheat berries are a power grain offering protein, iron and fiber in every bite! 


You know what else I love?  The combination of ingredients in this here salad!  


I never thought I would say this, but the star ingredient in of this salad is one of my all time favorite veggies, brussel sprouts.  These delicious little green veggies have been combined with tangy cranberries, crumbly feta, wheat berries, and a lemon honey poppyseed dressing to create a delicious and fresh salad!  


The dressing is light enough to offer a subtle hint of flavor.  But believe me you don't need much dressing, this salad has enough flavor on its own!  The brussel sprouts are pan seared to a nice golden brown, which really gives them a lovely flavor!  


Enjoy this salad as a light lunch or meatless dinner.  This salad would also be delicious served along side salmon or grilled chicken

Enjoy! 

Brussel Sprout Salad with Wheat Berries, Cranberries and Feta 
Featuring a Lemon Honey Poppy seed Dressing 
Brunch N' Cupcakes
Serves 3-4

Ingredients:

Salad
1 Cup Wheat Berries - Prepared 
1 Lb Brussel Sprouts, washed and halved 
1/4 Cup Cranberries 
1/4 Cup Feta Cheese either cubed or crumbled 
3 Cloves Garlic Minced
2 teaspoons pepper 

Lemon Honey Poppy seed Dressing:
2 Teaspoons Honey 
Juice from one Lemon 
1 Teaspoon Poppy Seeds 
2 Teaspoons Apple Cider Vinegar 
1/2 Teaspoon Garlic 
1 Tablespoon Olive Oil 

Directions: 
1- In a large skillet heat 1 teaspoon olive oil, saute garlic until fragrant. Add brussel sprouts and pepper.  Cook brussel sprouts for about 20 minutes, until outside edges begin to look "chared" or brussel sprouts are tender. 
2- Combine prepared wheat berries, cooked brussel sprouts, cranberries and feta in a large bowl. 
3- In a separate smaller bowl, whisk together dressing ingredients. 
4- Pour dressing over wheat berry mixture, and toss to combine.  Serve and Enjoy! 


Monday, February 10, 2014

{Dinner: Black Bean Turkey Tacos}


I absolutely love tacos.  I love the their versatility and love that tacos can be an easy to prepare weeknight dinner!  Plus, tacos are a huge crowd pleaser! 


And, how could I forget that tacos are just down right delicious!  I always have a hard time responding when people ask me what my favorite food or meal is.  And you know what? I think that tacos might rate up their as one of my favorites!  Taco nights growing up, were always kind of a big ordeal.  My parents set out every taco "topping" imaginable to ensure that there was something for everyones taste buds.  To this day I still feel like I have to set out a "spread" of taco toppings every time I make tacos!  


These delicious tacos feature lean ground turkey, black beans and veggies to bulk up this slightly spicy taco filling.  Serve this flavorful taco filling wrapped in warm whole wheat tortillas or as your "meaty" taco salad topping! 


Black Bean Turkey Tacos
Brunch and Cupcakes 
Serves 3-6 Depending on how hungry people are! 

Ingredients:
1 Lb Lean Ground Turkey
1 Cup Black Beans
½ Large Onion chopped
1 Green Pepper Chopped
2 Garlic Cloves Minced
2 Teaspoons Cumin
2 Teaspoons Cilantro
1 Teaspoon Chile Powder
2 Teaspoons Pepper
½ Teaspoon Cayenne Pepper
6 Taco Shells
Lettuce, Avocado, Salsa, Sour Cream, Tomatoes and Additional Onion for Serving

Directions 
 1- In a large skillet sprayed with cooking spray sauté your onion and green pepper until tender.  Add in garlic and sauté until fragrant.
2- Remove veggies from pan and set aside.  In the same skillet add your ground turkey and spices (Cumin through cayenne pepper) cook meat until no longer pink. 
  3- Add your veggies back into the skillet with the meat along with the black beans.  Cook on stove for 2  minutes or until well heated.
4- Serve with warm whole wheat tortillas and toppings of choice!

Enjoy!


Friday, February 7, 2014

{CopyCat}


One of the first restaurants I fell in love with in Minneapolis was Tao Natural Foods.  My mom and I went to Tao on a whim for lunch after signing the lease at my big girl apartment almost 2 years ago!  


I instantly fell in love With Taos charm, their simple menu chalked full of good for you options and their pleasant staff.   To this day, whenever I go to Tao, I always order their Avocado Rice Place.  This dish is delicious yet simple.  The plate is a combination of rice, black beans, tomatoes, and avocado; drizzled with a little soy sauce and sesame oil for flavor. Like I said simple yet delicious!  


I love Tao's Avocado Rice Plate so much that I have recreated this simple bowl at home countless times.  I generally have all the ingredients on hand, and this simple meal takes little to no prep time!  It really is a no fuss delicious dinner.  Recently I have been subbing in a combination of quinoa and wheat berries for the rice!   Pick your favorite grain, sub in any vegetable you like you really cannot go wrong! 

The Avocado Rice Plate - Tao Natural Foods 
Serves 3-4

Ingredients: 
2 Tomatoes Chopped and Seeded 
1 Avocado, Pitted and thinly sliced 
1/2 Cup Quinoa 
1/2 Cup Wheat Berries 
1 Can Black Beans (low sodium, drained and rinsed) 
Sesame Oil and Low Sodium Soy Sauce for Serving 

Directions:
1- Combine quinoa and wheat berries with 2 cups of water in a medium sauce pan.  Cook for 40 minutes or until water is gone and wheat berries are tender. 
2- Assemble your plate. - Divide Quinoa/Wheat Berry mixture among 4 plates (or portion out a serving and store remaining).  Top your grain mixture with 1/4 - 1/3 Cup beans.  Divide tomatoes among the four plates and top with avocado slices.   Drizzle with sesame oil and soy sauce if desired.  

Enjoy!